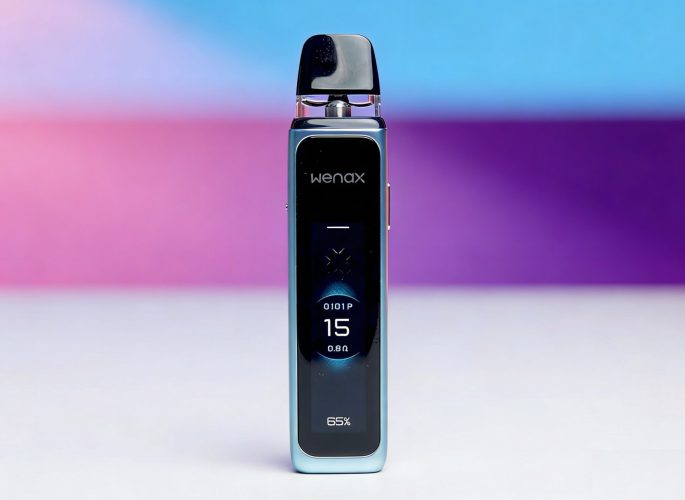
From the first time that you look at the Geekvape Wenax Q Ultra, it’ll be obvious to you that there’s no other vape quite like it because it’s controlled almost entirely by a full-color touch-screen display rather than an array of buttons like most other high-end vapes.

The touch screen on the Wenax Q Ultra isn’t just there for looks. It also means that you’ll interface with the device in a completely different way compared to most other small pod systems. It’s not quite as simple as charging, filling and vaping if you want to get the most out of your experience.
On the other hand, though, features like adjustable power give you infinitely more flexibility than you get with most other small pod systems – and with the touch screen, accessing those features is completely intuitive.
The few minutes that you’ll spend reading this Geekvape Wenax Q Ultra instruction manual are all it’ll take to get yourself up to speed with this device and become a seasoned pro. Here’s everything you need to know about using one of the best vape starter kits for beginners in 2026.
How to Charge the Geekvape Wenax Q Ultra
To charge the Geekvape Wenax Q Ultra, connect the device to your computer or a USB wall adapter using the charging cable included in the package. Almost any wall adapter will work with the Wenax Q Ultra, but you should avoid using a high-speed charger designed for a phone or computer due to the potential overheating risk.
While the Wenax Q Ultra charges, it displays an animation on the screen. The animation includes an estimate signifying how much longer you’ll need to wait for the battery to be full.
How to Fill the Geekvape Wenax Q Ultra
Depending on which version of the Geekvape Wenax Q Ultra you’ve purchased, your kit may include top-filling or side-filling pods.
- To open a top-filling pod, pull the mouthpiece until it pops off.
- To open a side-filling pod, use your fingernail to open the silicone stopper.
Add your e-liquid to the pod, stopping when the pod is nearly full. Leave a little empty space to ensure that the pod won’t leak. Replace the mouthpiece or stopper and wait at least five minutes before you start vaping.
The Wenax Q Ultra ships with a pod already installed in the device. To prevent unintended activation, the pod has a sticker covering the metal contacts on the bottom. You’ll need to remove the sticker before you can use the pod.

How to Vape with the Geekvape Wenax Q Ultra
Once the Wenax Q Ultra is charged and filled, you’re ready to start vaping. Here’s how to do it.
- Turn the Wenax Q Ultra on by pressing the button five times quickly. During the startup sequence, the device displays a quick-start guide on the screen (Swipe down to open the menu, swipe right to go back a page in the menu, swipe up to close the menu). Tap the “Start” button to continue.
- Inhale through the pod’s mouthpiece to vape. If you’re new to vaping, remember to use gentle air pressure. You should use much less air pressure than you’d use when smoking a cigarette. If you hear a gurgling sound, you’re inhaling too firmly.
- Use the tab on the side of the device to adjust the airflow for a tighter or looser draw.
- Refill the pod when the level of e-liquid starts to get low. You never want the vape juice to go all the way to the bottom.
- Replace the pod when the flavor quality begins to suffer. Don’t forget that you should always wait a few minutes before vaping when filling a new pod for the first time.
Changing the Wattage
The Wenax Q Ultra automatically selects an appropriate wattage when you insert a pod, and it also limits the maximum output to ensure that you won’t encounter any unpleasant burnt flavors when vaping. You can change the wattage within that range, though, if you prefer an experience that’s smoother or more intense.
- Swipe down to open the menu.
- Tap “Output.”
- Swipe to select your desired voltage.
- Tap the check mark.
- Swipe up to close the menu.
Changing Other Settings
One of the things that makes the Geekvape Wenax Q Ultra so special is the huge assortment of settings that you can change and how easy it is to get to those settings thanks to the touch-based interface. Do you want to change something about how the device works? Here’s what you can do.
- Swipe down to open the menu.
- Click “Theme” to change the screen’s theme or “Custom” to change the device’s other settings.
- While in the “Custom” menu:
- Tap “Lock Screen” to disable the automatic screen lock. With the lock function disabled, the Wenax Q Ultra is ready to go as soon as you press the button.
- Tap “Haptic Feedback” to disable the vibration function.
- Tap “Motion Feedback” to disable the screen animation when you vape.
- Tap “Raise to Wake” if you want the Wenax Q Ultra to unlock itself automatically when you pick it up.
Error Message? Here’s What It Means
Since the Wenax Q Ultra has a high-resolution screen, it has room for plenty of text and can clearly communicate what’s going on if there’s a problem. If you see an error message on the Wenax Q Ultra, here’s what you need to do.
- Pod Shorted:The Geekvape Wenax Q Ultra is having trouble detecting the installed pod. Remove the pod and check for dirty connectors or leaked e-liquid. Make sure that all surfaces are clean and dry and try using the pod again. If the error persists, replace the pod.
- No Pod:Follow the same steps outlined above.
- Battery Low:Charge the Wenax Q Ultra fully and try vaping again.
- Overheat:The internal temperature of the Wenax Q Ultra is too high. Move the device to a cooler location and stop using it for a while. Don’t vape in direct sunlight or leave the device in a parked car.
- 10s Time Out:The Wenax Q Ultra has a built-in cutoff for long puffs that helps to prevent the device from overheating. Maintain a puff length shorter than 10 seconds to avoid seeing this error.