
Are you inclining towards more control over your vaping? If so, RDA is absolutely the next thing you should look to. It would maximize the customization in every single setup of your vaping and take your puffs to the next level. All in all, RDA is able to give you the vaping experience exactly the way you want it.
In this article, we’ll explain some basics about RDA vaping to help you come to grips with it quickly. For more RDA term explanation, check out our other guide: RDA Vs RDTA Vs RTA.
What is RDA?
RDA is the abbreviation for “rebuildable drip atomizer.” Merely from the literal meaning, it’s safe already to infer that RDA might involve lots of DIY projects and vape juice dripping.
The inference above is really close to the right answer. Unlike typical vape tanks of regulated box mods which are all set to go when we receive them, RDAs require us to install the coils and wicks on our own. Another big difference between them is that RDAs have no exclusive reservoir to hoard e-liquid. We store the liquid in the absorbent cotton wicks. That explains why it’s dripping—the room in cottons is not spacious enough to store vape juice in. When we vape the juice off, just drip some more in there. RDAs enable vapers to quickly swap out juice flavors. You don’t need to wait until running out of a full tank to switch to another flavor you want to try.
What Parts Make Up an RDA?
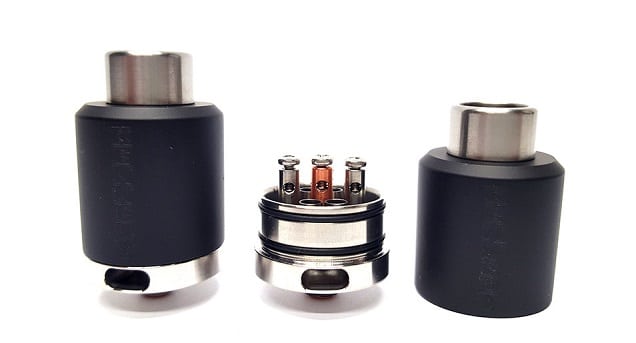
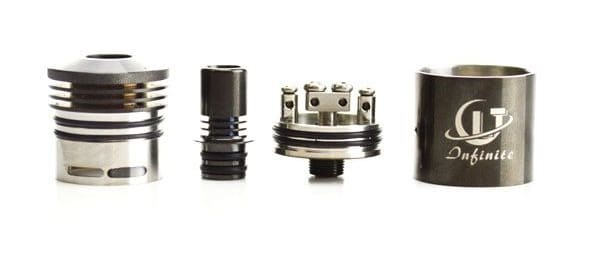
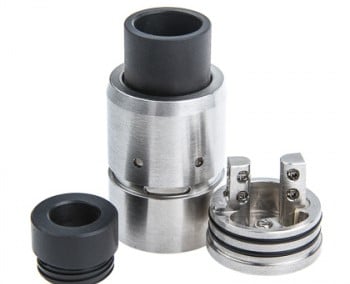
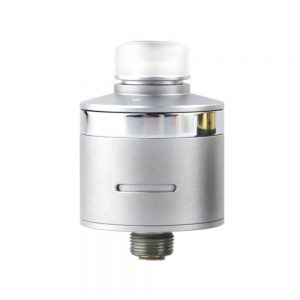
An RDA may look puzzling to newcomers. While once you learn about what rests under its shell, those presumed obstacles will be knocked out at once. When breaking down an RDA, you can see a drip tip, cap, build deck and 510 adapter from top to bottom.
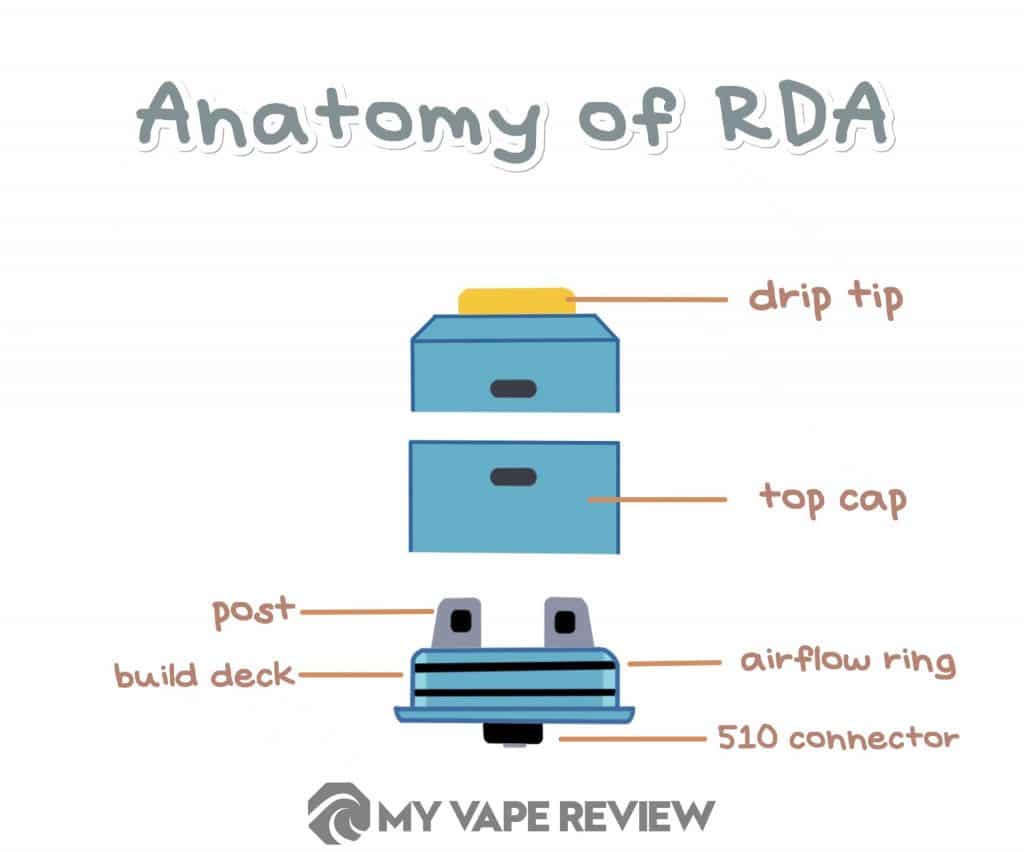
The drip tip is where you breathe in the vapor, despite that it’s originally designed for liquid dripping. Whilst the cap, standing in the middle, is just an outer cover to protect the build deck. At the base of an RDA is always a 510 adapter for mod connection. It connects your atomizer and the power source so you get a continuous supply of power from the battery to heat up coils.
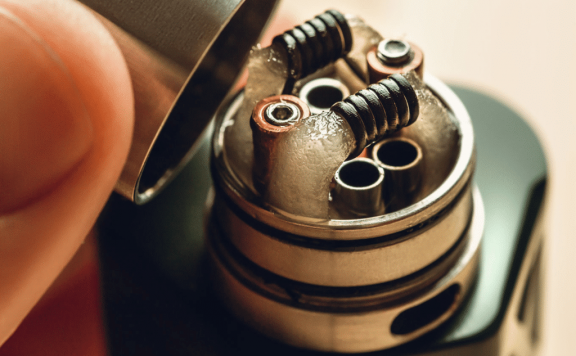
Build deck also sits at the base of an RDA. It usually consists of several posts standing upright there, with holes on them so you can thread the coil legs through. From a certain view, the deck is the core of all sorts of rebuildable atomizers, since it’s where the manual work happens, and in turn determines the flavors and vapors you’ll create.
Various Types of RDAs Explained
Three-Post, Four-Post and Two-Post RDAs
Before we further delve into all these whatever-post RDAs, it’s essential to know what’re the posts geared for and how they really work. Posts help to connect the coil to the deck. Each post comes with one hole, which can be opened up when you loosen the screws at the top. To get you coil properly functioning in the end, you need to insert both legs of it through the post holes, one for positive and another for negative, and tighten the screws down. Also note that you may want to let the coils stay aligned with the posts in case of lousy flavors caused by uneven heating.
-
Three-Post RDA
Three-post is the most basic RDA deck style. Just as the name suggests, these RDAs house one positive post at the center, and two negative posts on the fringes of the deck.
No matter you prefer single or dual coil vaping, three-post RDAs can leave you satisfied. Keep in mind that if you build dual coils, the builds will share one positive post hole.
-
Four-Post (Split Center Post) RDA
In order to get rid of the hassle of threading two coils through one post, manufacturers brought the easier four-post RDAs. The new iteration splits the original center positive post into two, thereby also dubbed as split-center-post RDA.
In this case, building multiple coils becomes much easier than before. The positive ends of your coils don’t have to force themselves into one post hole any more, but stand separately from each other in a comfortable manner.
-
Two-Post (Velocity-Style) RDA
The two-post layout is the latest leap in the RDA deck design. To optimize the spaces used, it retains only one positive post and one negative post, each on one side; another key improvement is that it drills two holes in each post, and moves the screws from the top to the side.
The innovative updates make two-post RDAs an optimal solution for multiple-coil builds. By decreasing the amount of posts, the overall layout looks more spacious. While that doesn’t affect the ease of use at all, which raises up a bit instead, as there’re now enough (four) post holes to accommodate more than one coil. Such two-post design first came out in a vape device called Velocity. That, as a result, gives it another name of “velocity-style RDA.”
If you’re searching for this sort of RDAs to try out multiple-coil builds, we recommend you add the keyword “velocity.” The market hasn’t given an explicit definition for two-post RDAs, which now also include those with only two post-holes and designed for single coil builds.
Single and Dual Coil RDAs
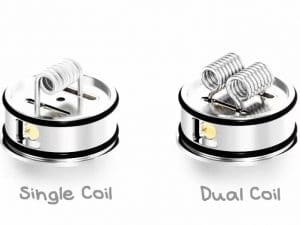
Whether you should build single or dual coils on your RDA largely depends on the amount of posts on the deck. It’s because each coil needs two posts, one positive and the other negative, to function. If the deck allows for both single and dual coil builds, such as those of velocity-style or four-post RDAs, then the choice just comes down to your personal preference.
-
Pros of Single Coil RDA Vaping
- Requires less expertise to build;
- When coils come in the same specs, single coil needs lower wattage to perform, and thus drains both the battery and e-juice slower.
-
Pros of Dual Coil RDA Vaping
- Produces larger amount of vapors when all other things are equal (coil resistance, power, etc.);
- Gives nicotine satisfaction faster.
-
Which One is Better?
The benefits of the two coil styles are plain to see. The former involves easier operations and lasts longer on one recharge and refill. Overall it’s more suitable for all the newcomers to RDA vaping. While dual coils, despite they’re relatively more difficult to build, deliver truly better performance, making it a popular option among advanced cloud-chasers.
One tip to keep in mind when building multiple coils is to make sure they’re identical in size and sit flush. Otherwise, they probably get improper heating and create terrible vapors.
Traditional and Mesh Coils
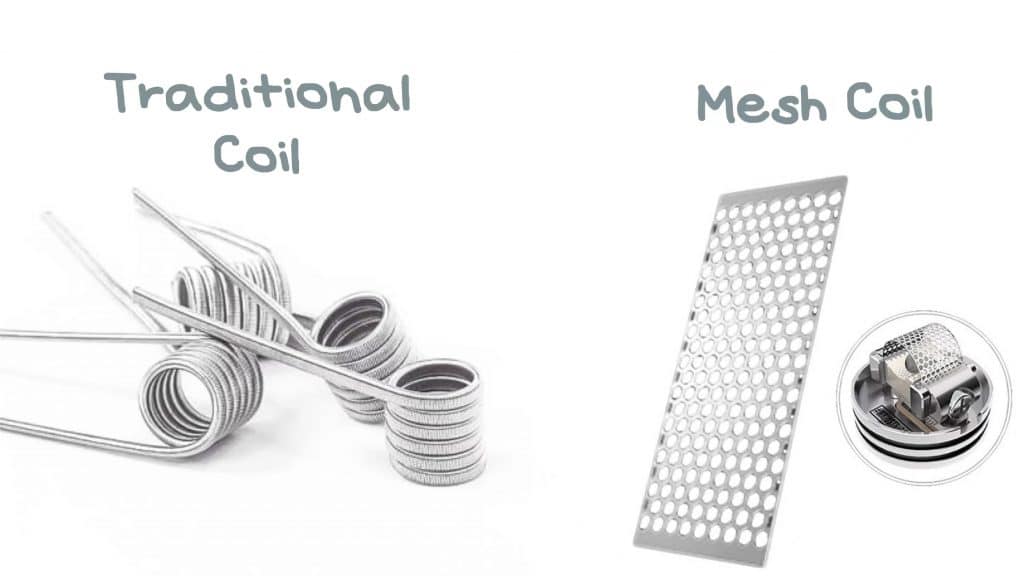
If we classify the coils for RDA builds by shape, the two major players are traditional coils and mesh coils.
Traditional ones are always threads of wires when you originally get them. Before attaching them to the build deck, you need to wrap the wires on your own to shape them into a literal coil. Wrapping coils plays a big role in whether you’ll have great vapors afterwards. That being the case, in recent days some manufacturers also start to provide pre-wrapped coils.
Mesh coils, however, are a strip of grid-shaped metal, usually made of durable kanthal, stainless steel or nichrome. They take such a form mainly to increase the contacting surface with e-liquid. Besides, the structure forces the same volume of current to travel across a wider area now. For the two reasons, mesh coils always give more even heating and can maximize the performance.
-
Features of Mesh Coils
- Perform better than traditional ones at high wattage
- Produce bigger vapors and better flavors
- Have less chances of dry hits thanks to the smooth heating
- Meant for sub-ohm and DTL vaping styles
-
Features of Traditional Coils
- Adapt to lower-watt running
- Have a shorter life
- Better fit MTL vaping style (if you don’t want to burn it out quickly)
We could see tons of differences out there between traditional and mesh coils. If you don’t intend to ramp the watt up wildly high as those experienced RDA vapers, traditional coil is a good option to start with. Of course, we encourage you to switch to mesh coils once you gain more expertise in RDA vaping.
RDA Airflow: Side, Top, Bottom and Vortex
Airflow system is another key factor to consider for avid RDA vapers. Granted, it’s not a section as eye-catching, but the reality is it has stumped a multitude of manufacturers to roll out a perfect design.
From a physics perspective, the performance of our RDA reaches its peak when the airflow directly hits the coil from beneath. But the great finding only leaves engineers at a stand—as they place airflow holes on the atomizer lower, it’s more likely that vape juice would leak out. That’s why we could see a continuous iteration in RDA airflow layouts on the market. All the updates come as more of a sign showing how hard it is to strike a balance between decent performance and less leaking in airflow systems.
-
Side Airflow (Cyclops Style Airflow)
There’s a traditional airflow system ditching one or two horizontal slots at the side of atomizers, paired with a ring for adjustment. By rotating the ring, we can easily fine tune the airs allowed in. This is what we call side airflow, or also cyclops style airflow.
When we use side airflow systems, air comes from the side and move past our coil horizontally. The only bummer is you have to keep it from lying down or tilting too much until you use up the juice in there. Otherwise it might leave you a messy puddle to take care of.
-
Bottom Airflow
If we talk about performance alone, bottom airflow will definitely hit the spot. Airs now come from the base to strike out coils directly and rise up to the drip tip. Talking from experience, bottom airflow tends to make for bigger vapors and more intense flavors.
But that comes at a price. The chances that you’ll get a messy spillage are far bigger as well. This is an inevitable flaw of such design. Just stay mindful not to overspill or flip your RDA or throw it into your pocket when you haven’t vaped off the juice.
-
Top Airflow
It stands to reasons that the top airflow layout is designed to fight against the troublesome leaking issues. Now you can finally get rid of the spillage anxiety and treat your device as you want.
With this system, air comes from the top of your RDA and is then channeled down to hit the top of coils. You can also get fabulous flavors, but not as good as other options. The vapor amount will be cut down as well, since in theory there’re less air hitting the coil.
-
Vortex Airflow
Vortex airflow gets its name because it literally pushes the air to rotate round an axis and form a vortex. By swirling the airflow that enters your RDA, it further enhances the flavors to another level. Compared with the three airflow systems above, it’s still a new thing. The best method to find your best match is going through a couple of trials and errors.
Things You Need to Build an RDA
It’s a good thing if you’ve mastered all the basic theories about RDA vaping. While that alone can’t make coil building happen—you need a real tool kit to get all set for the trip.
Note that some RDA kits would offer all necessary tools for coil building to save you from the hassle of buying extra stuffs. And the purpose of this section is to guide you to arm yourself even if you’re not provided with any of them.
-
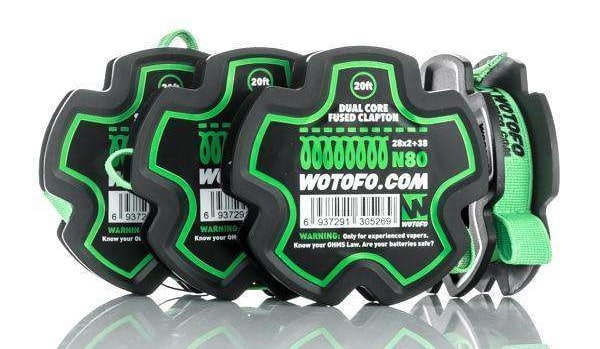
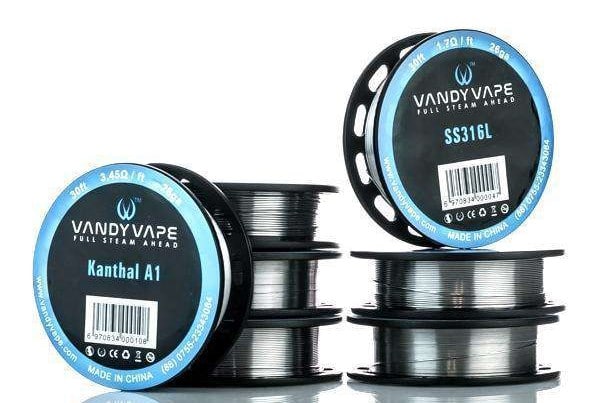
Resistance Wire
A core thing of RDA building is the wire that we wrap to make coils. The materials of coils may vary greatly, including Kanthal, nichrome, nickel, stainless steel and titanium. Generally, kanthal and stainless steel wires are considered as the safest options for vaping, and most recommended for RDA build beginners. Besides, Nichrome is also a sort of stable alloy suitable for power mode. In contrast, nickel and titanium coils are less popular metals among RDA vapers, since they heat up too fast and better go with temperature control modes for safety reasons.
We recommend you to buy coil wires from big vape brands, like Wotofo and Vandy Vape. They prove to be more durable and easier to work with.
WOTOFO PREBUILT SPECIALTY WIRE SPOOL – 20 FEET
VANDY VAPE WIRE SPOOL – 30 FEET
-
Screwdriver
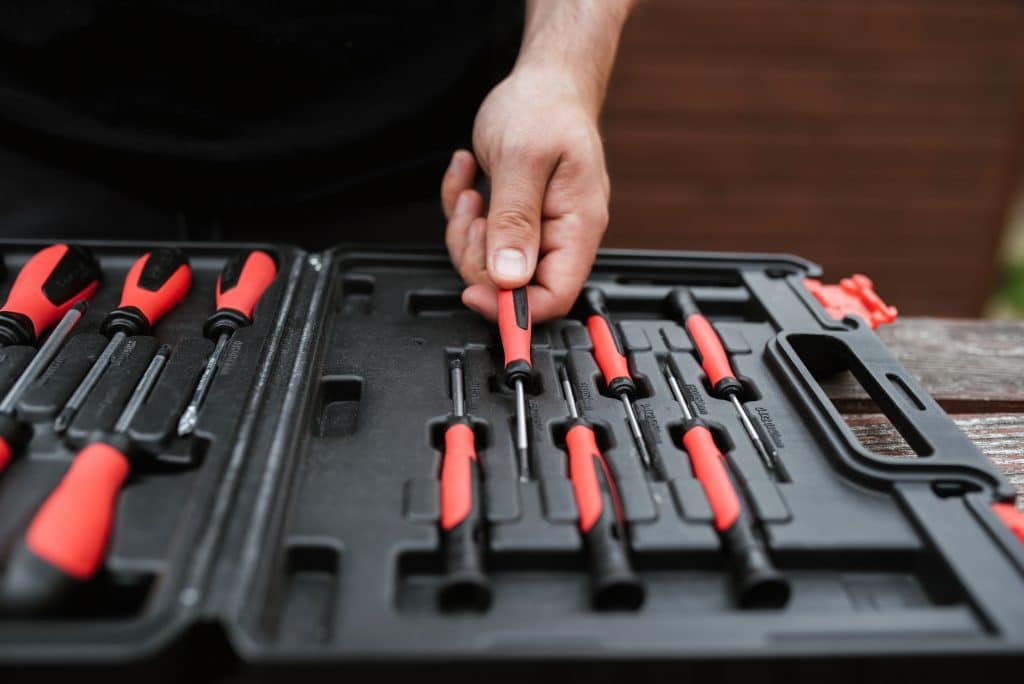
Keeping a screwdriver close at hand, especially a precision screwdriver set, is as important. We need it to loosen and tighten down the screws on the deck posts for one thing. For another, it can serve as a convenient tool to wrap coils. Of course, you’re free to use any rod-like alternatives to complete the wire wrapping, as long as you ensure the final coil comes with uniform diameters.
The best diameter for built coils stands between 1.5mm and 3mm on average, and it would be better to keep your coil within the range. It further explains why a good screwdriver set is necessary—typical sets would mark their diameters on the packages so you don’t have to worry about the measuring.
-
Wick Materials
There’re a world of materials (cotton, stainless steel mesh, silica and ceramic) suitable for wicking, but cotton has always been the mainstream choice when it comes to RDA vaping. But it’s worth mentioning that not all cottons can be used in coil builds, either for quality concerns or for the form they take.
Japanese organic cotton is the gold standard in coil cottons. These small cotton pads are originally widely accepted as useful skincare products, but turn out to perform fairly well in vape wicking. In addition, Cotton Bacon and COTN Threads are equally popular wick materials. They both come in easier-to-operate strips and can fit the size of most coils.
JAPANESE ORGANIC COTTON PADS
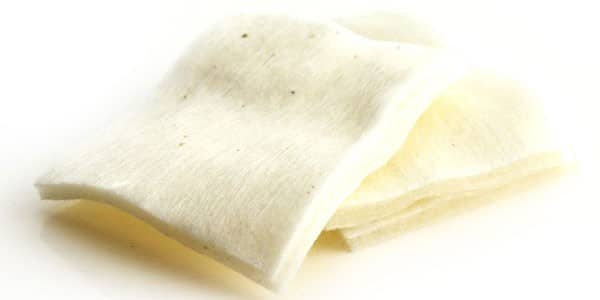
ORGANIC COTTON BACON V2 BY WICK ‘N’ VAPE

COTN Threads

-
Tweezer
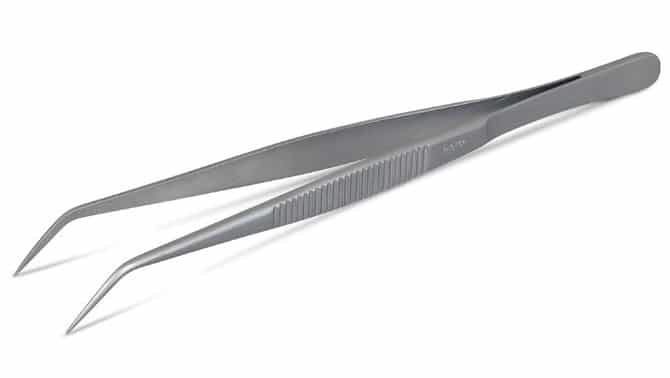
It helps a lot when you need something to put the cotton wicks in place, especially when they need to pass through the tiny coil center. Just grab the end of your cotton with the tweezer, and pull it gently through.
-
Scissor

They could work quite well in trimming down the extra part of your cotton wicks and coils.
Steps to Build an RDA Coil
Building coils for an RDA is much less complicated as it seems. In our earlier post we’ve covered this, so this part won’t repeat too many details but only focuses on the key steps.
1. Examine the deck.
The first thing to do is to see how many coils your RDA can accommodate. If it allows for both single and dual coil vaping, then it’s your turn to decide which style to go for.
You might also want to check the size of your deck, so you’ll learn about the biggest diameter allowed in your build. 3 mm is the safest upper limit that most RDAs on the market allow for.
2. Plan your coil in advance.
For vapers who have extensive experience in RDA builds, they can just skip this step. While if this is not the case for you, a good prior planning can be fairly useful.
First of all, you need to have a preferred coil resistance in mind. In general cases, RDA vapers would opt for the sub-ohm vaping style and put the resistance lower than 1ohm. Next, you can use the online tool Coil Wrapping Steam Engine to figure out the optimal coil length to match your desired resistance, and cut off the extra section. The tool will also tell you how many wraps you need.
3. Wrap the wire.
This process is actually simple but really needs some patience. You need to wrap the wire around your screwdriver, or any rod-alike things as we said, to shape it to a coil. The most important part is to keep all the wraps in the same diameter.
4. Connect the coil to the deck.
Coil connection can basically be divided into three super easy steps: unscrewing the screws, inserting the coil leg through the post holes, and securing them in place with screws.
5. Wick the coil up.
Now we’re quite close to the end. To complete wicking, you only need to thread a strip of cotton through the coil—that’s almost finished. Next you may want to trim down the extra part and comb through both ends of the cotton to make them fluffy so that you’ll get more even heating.
6. Prime the coil and start your flavorsome RDA journey.
Before you can start to enjoy wonderful vapors from the RDA, you need to fully saturate the cotton wick and let it sit for at least 5 minutes. When you coil has soaked up enough juice, it’s finally ready to go.
Quick Tips for RDA Vaping
When installing the coil
To install your coil, the first thing to do is of course removing the screws to let the coil leg in. After every coil sits in place, tighten it down with a coiling tool. You might be thinking about rushing to the next step, but we’d recommend you double-check your building.
- Make them align to each other if you install dual coils. That could ensure both your coils heat evenly. Otherwise your vapor would turn bad when one of the hot coils dries out its cotton.
- Preheat the coils before wicking. Dry burning your coil for seconds could clean off the mechanical oil on you coil, and help you examine hot spots. It’s not a necessity though. Anyways, if you choose to torch a coil before wicking, don’t take it too far in case of a burn-through.
When attaching the cotton pads
After you pop the coils in right where they should sit, it’s time to wick the cottons. When wicking is done, you can drip some vape juice to saturate your cottons and install the top cap back in. But there’s something you should keep in mind before good to go.
- Keep the cotton pads fluffy. Comb the cotton out to make them fluff. It would enable the liquid to soak into cottons more evenly and thus deliver more smooth vaping.
- Keep them neatly placed. Cut the cottons to a proper length and tuck the two ends in.
Advantages of RDA Vaping
You must have noticed RDA vaping does require much more hands-on efforts than regular vape tanks, while a large amount of vapers are obsessed with it anyways despite all those complications. RDAs have so wide appeal for several good reasons.
RDA, first of all, is the best option to customize everything to your exact liking. It’s not only about the coil resistance—you could also decide the volume of air allowed in by tweaking the cotton thickness. And as we said before, when using a RDA, we drip a little liquid into the cotton and vape until it dries out. That means we could swamp to various flavors very easily. Moreover, RDA is also an optimal thing to go for if you’re a flavor chaser.