

Are you new to vaping but find coils expensive to own, or are you tired of continuously changing coils? Be rest assured—you can build your vape coil easily. This article explains how to build a simple vape coil and own the skills to building one for you and your friends.
The construction of a coil is an art that can be understood by any vaper. All you need to create one is a mild knowledge of things and patience because you might not get it right at the first trial. Coil construction has become popular because it costs less to build a vape coil than buying one in the long run, and your coil will affect your vaping experience entirely with adaptational choices. It is a satisfying hobby that allows you to completely regulate your vape taste.
What Are The Items Needed?
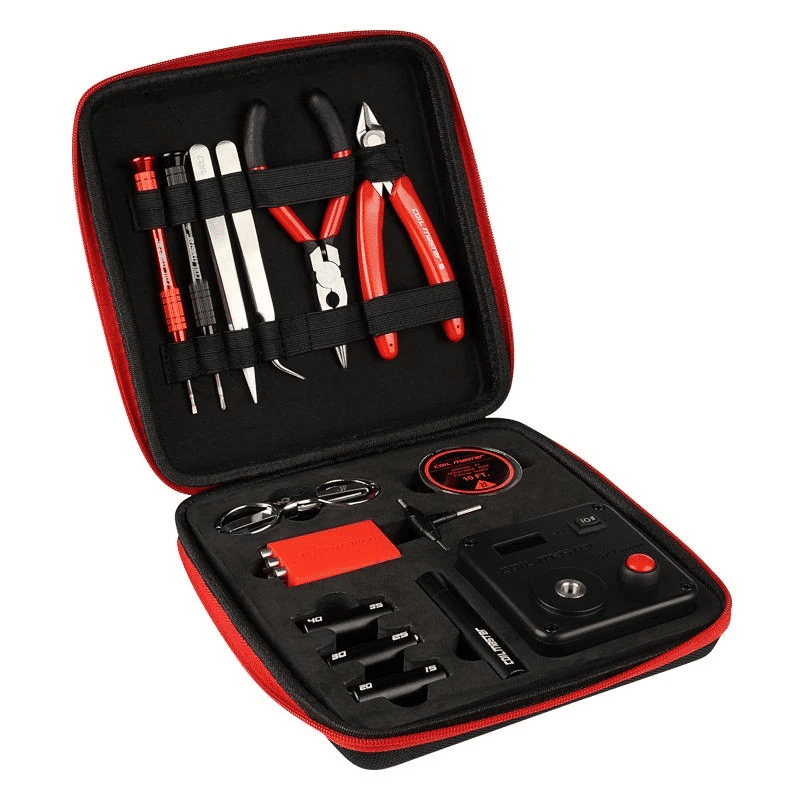
The items needed to build a vape coil are pretty much easy to get and can be gotten at stores easily. These items include:
- Short metal rod – Should ideally be lightweight enough to properly coil
- Flush cutters – High precision wire cutters for a close and neat cut
- Scissors – For cutting the wicking cotton.
- Ohmmeter – Or any device that reads resistance value
- Coil jig – To make it easier to wrap your coil
- Resistance wire – Kanthal, stainless steel, nickel, nichrome, or titanium
- Organic cotton – Or any similar wicking material
- Ceramic-Tipped Tweezers – Needed to remove hotspots and other miscellaneous tasks.
You should as well get a backup vape device. This is to allow you to vape and enjoy yourself while you build your core, and just in case the building doesn’t go well at first, you will have a backup plan.
What You Must Know Before You Proceed
You need to have a good knowledge of batteries as this will save you from accidents. Secondly, you should always have your tool kits beside you, and you should at least understand the basics of ohms’ law of electricity. A minor miscalculation could cause you to get injured if you use a mechanical mod. It is best to use a single micro coil with a power of 0.50Ω and only decrease this value if you have adequate expertise in constructing coils. You should always have an ohmmeter with you. Note that the amount of times you wrap your coil influences its resistance value.
How To Build Your Coil
After deciding what type of vape coil you want to build, i.e., micro or macro coil, this will guide the diameter and gauge of wire you want to use. Note that the higher the gauge, the thinner the wire, and also the higher the resistance; you can then follow the steps below to creating your coil when that has been decided.
- Coil wrapping stage
You can do this either by using a screwdriver or using a coil jig. If you plan on using a screwdriver, hold your screwdriver in one hand and begin folding your bit of wire over it. Keep the strain solid by making sure the turns are tight and firm. This is to allow for effective conductivity and try not to overlap the wire. Proceed until you have the right measure of circles for your ideal composition, and this can be calculated by using different websites like a steam-engine. Ensure the two finishes of the wire are placed in the same direction (like legs).
A coil jig, on the other hand, is an instrument used to set up your coil. To use this device, first, disconnect the cap of the coil jig, then string a couple of the wire through the opening at the top, with the aim that it comes out through the bigger hole on the side. At that point, fold a large portion of a turn of the wire over the steel bar, and put the piece of your ideal measurement onto the coil dance, which is around 30 mm long. After this, just begin turning the wire until your ideal circles are finished. Squeeze the formed circles together to make it tight and firm.
- Installing the coil
Start with separating your tank’s fabricate deck. At that point, hold the screwdriver with the coiled wire still on the assembled deck. Fix one leg of the wire in the negative port and the other in the positive port. Keep the wire as straight as possible and ensure that the coil is in the deck. Take the screwdriver out so that all you have left is an isolated coiled wire, and secure your screws for your coil.
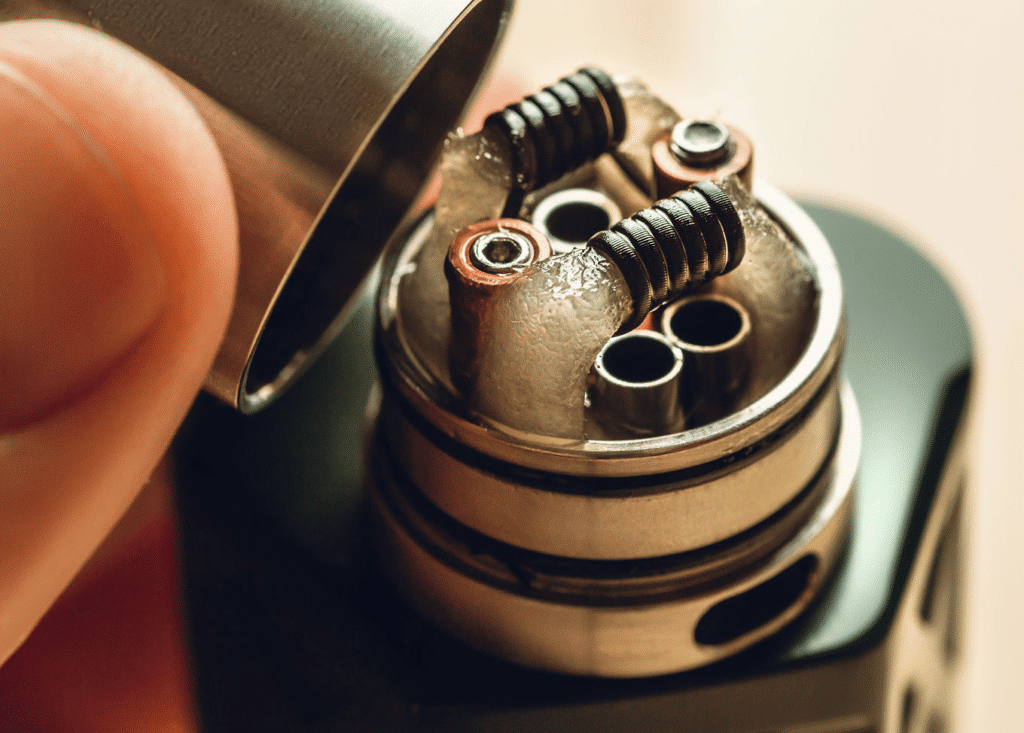
- Testing for short circuit, firing and eliminating hotspots
To do this, you will require your ohms meter here. It is important to check the resistance value of the coil to assure safety and prevent short circuits. If your ohmmeter shows a short, check the contacts between the legs (wire ends) and the coil. If it is still off, try reseating the wire in the coil. When this is done, you should also test the device. Join your tank with the mod and power your coil until it begins gleaming red with heat. Now, use your tweezers to squeeze the intensely hot coil to remove areas not glowing red and with different irregularities. Proceed until you have a consistently shining coil.
- Wicking your coil
Once your coil cools down from the trial test, it’s an ideal opportunity to add your absorbing wick. It is best to use organic cotton. Remove an adequate bit of the cotton with scissors, string it into the coil and make sure to leave a large portion about an inch of length on the two sides of the coil. These finishes should be long enough to allow the coil to fit in the tank, but be cautious as unnecessary wick could cause blockage in the smoke way.
In Conclusion
Before you start vaping, make sure to run some final testing and ascertain that all is well with the coil you just built by confirming all connections and screws are back where they should be. Remember that coil building isn’t as simple as it sounds. Before you can be a pro-constructor and adapt the vaping experience in a distinguished manner, it takes practice and skill.